
Cart 0 Product Products (empty)
No products
To be determined Shipping
0,00 € Total
Product successfully added to your shopping cart
Quantity
Total
There are 0 items in your cart. There is 1 item in your cart.
Total products
Total shipping To be determined
Total
3D PRINTER parts
- DRONES
- HELIS
- PLANES
- CARS
- BOATS
- SPARE PARTS
- QUAD COPTERS
- MICRO QUAD PARTS
- ALIGN M424 Quadcopter
- Quanum/CX-20/ DJI PARTS
- Cheerson CX-33 Parts
- Cheerson CX-35 parts
- freeX Parts
- SYMA X5 PARTS
- SYMA X8 PARTS
- HUSBAN PARTS
- WLtoys PARTS
- Tarantula X6
- Q-BOT PARTS
- Zoopa Q parts
- Eachine
- VISUO XS809/XS816 parts
- Eachine E58 PARTS / X-PRO
- VISUO XS812 GPS parts
- SHRC H1G GPS PARTS
- Eachine Tyro99
- Wltoys XK X1
- FUNSKY S20 PARTS
- Eachine E520S GPS PARTS
- Eachine E511S GPS PARTS
- Eachine Tyro79 parts
- Eachine EG16 parts
- Eachine Tyro129 parts
- Eachine Tyro109 parts
- Eachine Tyro69 parts
- JJRC X16 5G parts
- Eachine Tyro89 parts
- ΕΛΙΚΟΠΤΕΡΑ
- ALIGN
- ESKY
- E-FLITE
- TAROT (100% COPY ALIGN)
- WALKERA
- Walkera 38 Parts
- Walkera 4-3B/4-3Q2 Parts
- Walkera 5-10 Parts
- Walkera 5-6 Parts
- Walkera 53-1 Parts
- Walkera 5G6 Parts
- Walkera LAMA2 Parts
- Walkera UFO 5 Parts
- Walkera 4G3 Parts
- Walkera Metal Upgrade Parts
- Walkera 5G6-1 Parts
- Walkera 5G4Q3 Parts
- WALKERA 5-4,5,8 PARTS
- Walkera 53Q3 PARTS
- Walkera UFO8 Parts
- Walkera LAMA 400 Parts
- WALKERA LAMA2Q PARTS
- WALKERA LAMA2Q1 PARTS
- WALKERA UFLY
- Walkera 4G6
- SKYARTEC
- SKYA
- Hisky
- Wltoys
- ARK
- HK
- THUNDER TIGER
- GAUI
- ELE
- OUTRAGE
- COPTER X
- HDX
- Copter V-MAX Parts
- Copter Mini X - SH-6025-1
- ACME HELIS
- XK
- Eachine Parts
- XK-WLTOYS
- RC ERA HELIS
- ΑΕΡΟΠΛΑΝΑ
- ΑΥΤΟΚΙΝΗΤΑ
- Accessories
- 1/16 Short Course Truck
- 1/16 Brushless 4WD Racing Buggy
- JJRC Q35/Q36 PARTS
- 9115 parts
- Wltoys A989/A999/L939/K969/K989
- WLtoys A949 A959 A969 A979 PARTS
- Wltoys L959/L969/L979
- Wltoys 144001 parts
- Pxtoys PX9300 1/18
- RC Trailer
- Wltoys 12429 parts
- Eachine EAT04/Feiyue FY01/2/3 1/12 parts
- XLF X03 1/10 PARTS
- Xinlehong 913xx 1/16 PARTS
- Wltoys 12428 parts
- Wltoys 104001 1/10 PARTS
- Wltoys 124017 1/12 PARTS
- Wltoys 124018 1/12 PARTS
- HBX 16886 1/14 4WD PARTS
- HBX 903 RTR 1/12 2.4G 4WD PARTS
- HBX 16889A Pro 1/16 2.4G PARTS
- Wltoys 104009/12402 1/10 PARTS
- Wltoys XK 22201 1/22 parts
- F-20 2.4GHz 1/12 - PARTS
- Wltoys 144010 1/14 PARTS
- Eachine EAT15 Parts
- Wltoys 124010 1/12 PARTS
- Wltoys 284131 1/28 PARTS
- Wltoys 284161 1/28 PARTS
- Wltoys 124008 1/12 PARTS
- Wltoys 284010 1/28 PARTS
- 1/10 HSP PARTS
- Wltoys 184008 1/18 - parts
- WLTOYS 144016 1/14 - PARTS
- BOATS
- BLADES
- RC BEARINGS
- QUAD COPTERS
- RADIOS
- ELECTRONICS
- SPEED CONTROLLERS
- SERVOS
- FPV SYSTEMS
- ΚΑΛΩΔΙΑ & ADAPTERS
- SIMULATORS
- BEC & Regulator
- GADGETS
- ΜΠΟΥΖΟΠΙΠΕΣ
- ΦΩΤΑ & Night Flying
- ACME FlyCams
- ΔΙΑΦΟΡΑ
- BATTERIES & CHARGERS
- MOTOR
- TOOLS-ACCESSORIES
- ΕΡΓΑΛΕΙΑ ΜΕΤΡΗΣΕΩΝ
- ΒΑΛΙΤΣΕΣ
- COVERING FILMS
- ΚΟΛΛΕΣ & ThreadLock
- ΑΕΡΟΓΡΑΦΟΙ
- ΝΤΙΖΕΣ & AΞΕΣΟΥΑΡ
- ΔΙΑΦΟΡΑ ΑΞΕΣΟΥΑΡ
- ΑΞΕΣΟΥΑΡ NITRO
- ΜΠΟΥΖΙ
- ΜΙΖΕΣ
- ΤΡΟΜΠΕΣ ΚΑΥΣΙΜΟΥ
- ΕΡΓΑΛΕΙΑ & ΟΡΓΑΝΑ ΑΚΡΙΒΕΙΑΣ
- ΦΙΛΤΡΑ ΚΑΥΣΙΜΟΥ
- ΒΙΔΕΣ & Washer & E-Clips
- TRAINING KIT
- PITCH GAUGE
- TESTER
- TAPES & VELCRO
- Lubricants & Accessories
- DECALS & STICKERS
- ΕΡΓΑΛΕΙΑ MULTIFUNCTIONAL SKYA
- ΖΥΓΑΡΙΕΣ
- Cleaning Accessories
- Swashplate Leveler
- Starter Shaft
- Glow Ignitors
- DIGITAL MULTIMETERS
- LIGHTNING LED
- SOLDERING IRON
- HAND TOOLS
- DEPRON
- ΚΟΥΤΙΑ ΑΠΟΘΗΚΕΥΣΗΣ
- ΜΠΡΟΣΕΛΕΣ
- ΔΕΜΑΤΙΚΑ
- FOR BEGINNERS
- GADGETS FOR PC
- MAGAZINES & DVD
- SLUBAN BRICKS
- 3D PRINTERS / SCANNERS
- 3D PUZZLES
- ARDUINO - ROBOTICS
- DIY Electronic KIT

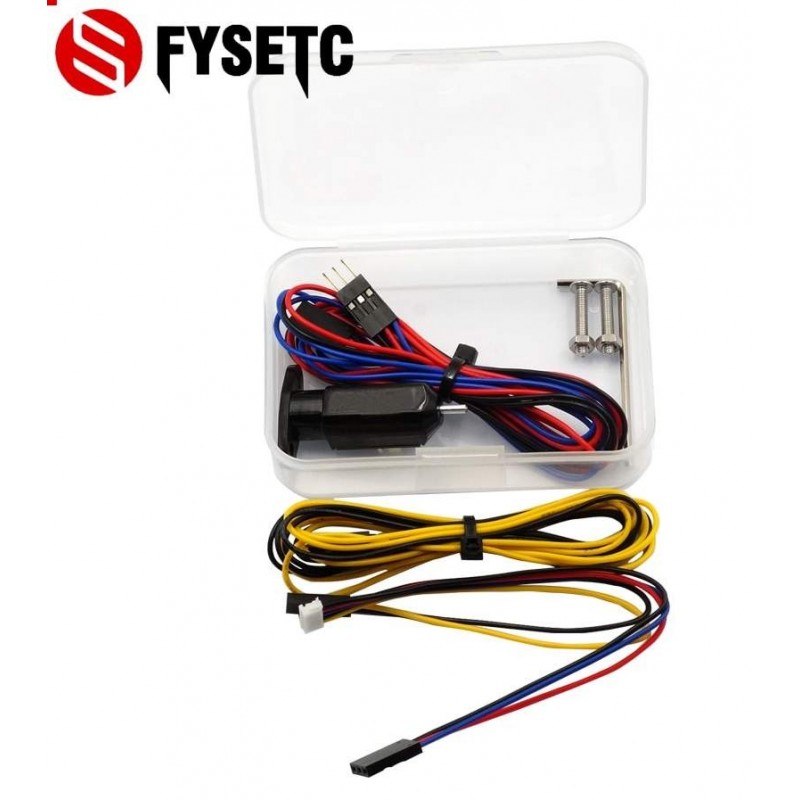


3D Printer z-probe Touch Auto Leveling Sensor Touch for Improve Printing Precision
(SKU): FYSETC-Leveling-Sensor
3D Printer z-probe Touch Auto Leveling Sensor Touch for Improve Printing Precision
In stock
More info
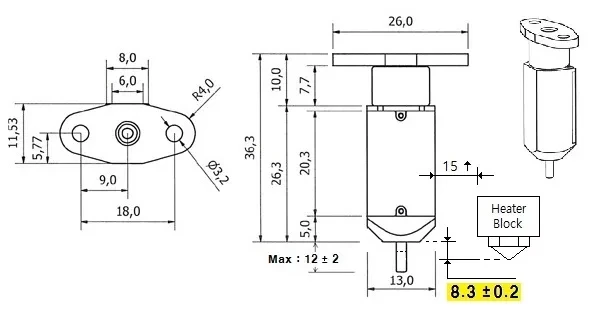
3D printer z-probe Touch uses the same servo signal which used in previous servo line.
■ Solenoid Push-pin Up ➡ servo signal 90Degree(ex : M280 P0 S90 )
■ Solenoid Push-pin Down ➡ servo signal 10Degree(ex : M280 P0 S10 )
■ Manual Self-test ➡ servo signal 120Degree(ex : M280 P0 S120)
■ Alarm Release ➡ servo signal 160Degree(ex : M280 P0 S160)
※ 3D printer z-probe Touch can be operated in the following condition.
- One I/O (PWM or Software PWM) for control
- One I/O for Zmin
- GND and +5V power
However, Firmware updating might be needed on a case.
If you use this on an Anet A8 then you need to cross over the YELLOW & BLUE wires. Couldn't figure out why it wouldn't work until I read the head unit. The Yellow is the endstop and the Blue is the pwm input, I just cut them and reversed them.
| Voltage | 5V |
| Current | 15mA |
| Maximum(Peak)Current | 300mA |
| Color | Semitransparent Black |
| Cable Length | 150mm |
| Weight | 0.35 oz(10g) |
| Wiring | 3Pin:Black(-,GND) |
| Red(+5V) | |
| Blue(control Signal) | |
| 2Pin:Black(-,GND) | |
| Yellow(Zmin) |